Say Their Name: A Stash-Only Route to Properly Personal Cards
There’s a particular sort of card that gets kept on a mantelpiece for weeks. It isn’t always the most complicated one. Often it’s the one where somebody’s name is right there on the front, in letters that look as though they were put there on purpose. The good news is that you don’t need a new gadget to do this. You need a little planning, a spare ten minutes and a willingness to work with what’s already in the drawer.
Personalisation is a design decision, not a shopping decision. A name can be stamped, snipped, handwritten, printed or tucked inside. Each route has its own character, and each one suits a different kind of card. The trick is to choose the method that fits the paper, the person and the postbox.
Start With the Name, Not the Layout
Before you reach for glue, write the name on a scrap of paper in pencil. Say it out loud. Check the spelling properly — not from memory, but from the message or invitation in front of you. A card that says “HAPPY BIRTHDAY, CLARE” when the recipient is Claire is the sort of mistake that follows you to the next family do.
Once the spelling is settled, count the letters. Long names need either a smaller alphabet or a design that lets the name wrap onto two lines. Short names can take a bolder treatment. This sounds obvious, but most personalisation disasters happen because the name was an afterthought rather than the starting point.
Four Ways to Put a Name on a Card
1. Alphabet stamps
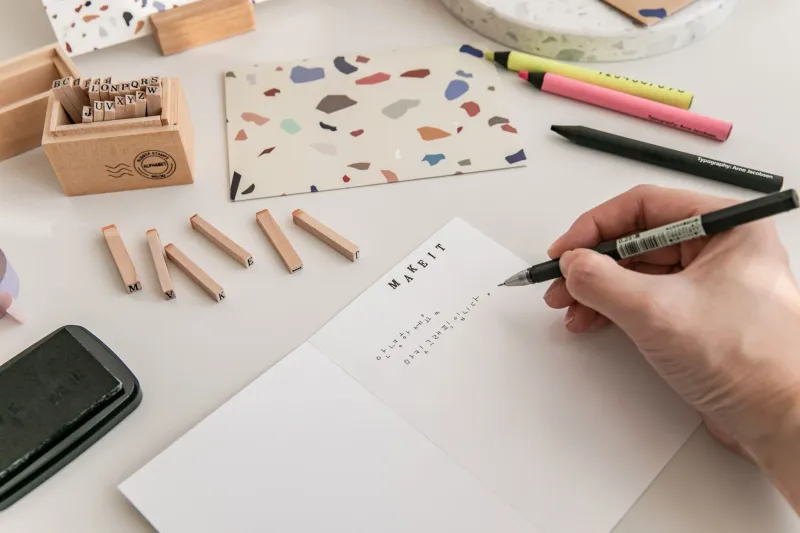
Alphabet stamps are the workhorse of personalised cards. They’re quick, they’re reusable and they look pleasingly handmade. The main challenge is alignment. Draw a faint pencil line where the baseline of the letters should sit, stamp onto scrap paper first to check pressure, and work from the middle of the name outwards if you can. That way any slight spacing wobble is shared across the word rather than pushed to one end.
Use a stamp positioner if you have one, but don’t worry if you don’t. A clear acrylic block and a light touch will do. Stamp the name onto a separate strip of card, trim it neatly and glue it in place. That gives you a second chance if a letter goes rogue, and it adds a nice bit of dimension without bulk.
2. Magazine-letter collage
The old ransom-note look can be brilliant when it’s done with a bit of restraint. Cut letters from magazines, old wrapping paper or charity-shop annuals, aiming for a mix of sizes but a similar tone. Keep the name to one or two lines, and leave plenty of white space around it so the mismatched letters feel deliberate rather than chaotic.
Use a glue stick for flat letters and a tiny dab of wet glue for anything with a shiny finish. Once the glue is dry, seal the whole name with a thin layer of matte medium or clear tape if the card is going through the post. It stops corners lifting and gives the collage a tidy, finished feel.
3. Simple hand-lettering
You don’t need calligraphy skills for this. A pencil guide, a fine liner and a little patience will get you a long way. Write the name in your normal handwriting first, then go over it with a slightly thicker pen. Add a simple underline, a row of tiny dots or a shadow line to make it feel designed rather than dashed off.
If your handwriting and you have never quite seen eye to eye, try block capitals. They’re forgiving, they suit almost every card style and they’re easy to space evenly with a ruler. A name in neat capitals, centred on a plain card, often looks more confident than a fancy script that has gone slightly sideways.
4. Printed inserts and enclosures
Sometimes the most personal part of a card isn’t on the front at all. A printed insert with a short message, a favourite photo or a tiny “made for you” note can do the job beautifully. Set the name in a simple font, print it onto card or paper, and trim it to fit inside the card. A small tag tied to the spine or slipped into a glassine bag works in the same way.
This route is especially good for cards that need to travel. The front stays clean and flat, while the personal detail sits safely inside. Add the name to the envelope flap as well, and the whole thing feels considered before it’s even opened.
Before You Write the Name
A quick checklist saves a lot of unpicking:
- Spelling: check it against a written source, not your memory. Nicknames are fine if that’s what they’re called, but get the spelling right.
- Spacing: mark the centre of the card lightly in pencil before you commit. Long names need a smaller lettering size or a two-line plan.
- Placement: decide whether the name is the main event or a small detail. Don’t let it fight with a busy patterned paper.
- Postability: keep the name flat. Avoid bulky knots, thick letter tiles or anything that catches on the sorting machinery. If the finished card feels lumpy, check it against a standard envelope and consider a padded bag or a large-letter stamp.
The Five-Minute Dry Run
Before anything is glued down permanently, lay the name on the card without adhesive. Step back. Look at it from arm’s length. Is it centred? Does it sit comfortably with the rest of the design? Would it still work if the recipient’s name were one letter longer? A dry run costs almost nothing and catches most of the things that go wrong.
Personalising a card is really just a way of saying “I thought about you specifically.” It doesn’t need to be expensive or technically clever. A stamped name, a snipped collage or a handwritten line on an insert all do the same job. Use what you’ve got, check the spelling twice and leave enough room for the envelope. The card will feel made for one person because it was.