The Left-Hand Advantage: Rethinking Your Craft Desk from the Other Side
There’s a moment every left-handed crafter knows. You sit down with a fresh blank card, reach for the trimmer, and realise the measurements are printed for someone else. The guard is on the wrong side. The handle leans away from your hand. You shuffle the card, turn the mat, and somehow end up with a score line that’s straight but not quite where you meant it to be. It’s not you. It’s the desk.
Left-handed card making doesn’t need a complete kit overhaul. What it needs is a bit of quiet rebellion: moving the tools, not the maker. Once you stop adapting your body to a right-handed layout and start adapting the layout to your body, everything from stamping to fussy cutting gets cleaner, calmer and a good deal more fun.
Start with the paper, not the tools
The simplest swap is also the most overlooked. Before you reach for a bone folder or a stamp block, turn your cutting mat so the grid runs comfortably under your left hand. Most self-healing mats are symmetrical, so there’s no reason the measurements have to sit on your right. If your mat has a printed ruler along one edge, rotate it 180 degrees. Suddenly the numbers are where your eye expects them, and your card stock isn’t being nudged across the desk every few seconds.
Keep a small ruler or a strip of low-tack tape on the left side of your workspace for quick alignment. It sounds tiny, but it stops the constant twisting and reaching that turns a relaxing card into a fiddly exercise. A clear desk is lovely; a desk arranged for your dominant hand is better.
Scoring and folding without the wrestle
Scoring is where handedness shows up most. A right-handed crafter tends to pull the bone folder towards themselves with the paper held steady on the right. Left-handers often find it more natural to work from the left edge inwards, especially on A6 and DL folds. Try scoring with the card positioned so your left hand guides the folder and your right hand simply holds the paper steady. It may feel odd for the first two cards, then oddly brilliant.
If you use a scoring board, check whether the measurements are readable from your side. Many boards can be turned or used from the opposite edge, even if the instructions assume otherwise. And don’t underestimate the humble bone folder: a smooth, ambidextrous one with a rounded tip is worth its weight in gold. Avoid folders with a sharp, right-handed ergonomic curve if you can — they tend to dig into the paper when used from the left.
For lighter card stock, a scoring stylus can be more forgiving than a blade-based scorer. It lets you feel the line rather than force it, which is exactly what you want when you’re building a clean fold on a card that will be opened and closed dozens of times.
Stamping: give yourself a runway
Stamping is less about the stamp and more about the approach. Right-handed stampers often work left to right across a card. Left-handers can naturally work right to left, which is fine — but it helps to place the stamp positioner so the hinge opens away from your hand. A stamp positioning tool is a genuinely useful investment here, not because left-handers make more mistakes, but because it removes the pressure of getting a perfect impression first time. You can re-ink, re-stamp and adjust without smudging the card or your confidence.
When you’re stamping a sentiment, try starting from the right side of the card and working inwards. This keeps your hand from hovering over wet ink. Keep a scrap sheet on your left for test impressions, and a damp cloth or baby wipe within easy reach — on the left, naturally. It sounds pedantic, but reaching across a wet stamped panel is how clean cards get mysterious thumbprints.
Die-cutting and embossing from the other side
Die-cutting machines are usually fairly neutral, but the sandwich order and the handle can feel right-handed. If your machine has a crank handle, try standing slightly to the left rather than directly in front. You’ll get a smoother, more even turn and less shoulder strain. When you place the die on the card, put the cutting edge where you can see it clearly without leaning over the machine.
Embossing folders are another small win. Run the folder through so the raised pattern sits where you want it, then check the result from your natural viewing angle before you commit to adhesive. Left-handers often notice texture differently because they tend to tilt the card the other way — use that. It’s a good habit for spotting uneven pressure or a folder that’s been slightly overfilled.
Fussy cutting without the claw hand
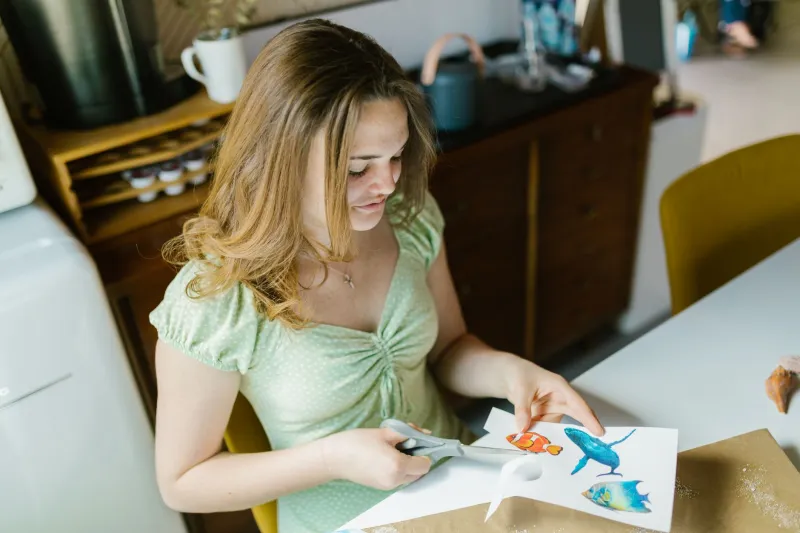
Fussy cutting is the great leveller: everyone finds it fiddly. But left-handers can make it easier by using left-handed scissors — proper ones, not the blunt school variety. A good pair with a comfortable moulded handle makes a genuine difference to control, especially on curves and tight corners. Keep a second pair of small, sharp snips for detailed work and store them blade-up in a pot on your left side.
Turn the paper, not the scissors. This is the golden rule for cleaner fussy cutting. If you find yourself twisting your wrist to follow a line, stop and rotate the card instead. It feels slower for the first few minutes, then much faster once your hand stops fighting the shape. A glass mat or a small turntable can help here, though a plain sheet of scrap paper works just as well for most projects.
A left-handed desk that actually works
You don’t need a dedicated craft room to make this work. A few deliberate choices are enough:
- Put your most-used tools — scissors, bone folder, adhesive, pencil — on the left side of your mat.
- Keep your stamp blocks and inks slightly further back on the right, so you’re not crossing your own hand to reach them.
- Use a small tray or mug for offcuts on the left, where your hand naturally drops things.
- If you share the desk with a right-handed crafter, mark the mat with a tiny piece of washi tape so you both know which way round it goes.
These are small things. Together they stop the low-level frustration that makes a hobby feel like hard work.
Three projects that lean into left-handed rhythm
Try a simple scored birthday card with a diagonal fold: score from the left edge inwards and decorate the right-hand panel. The natural sweep of your hand makes the fold feel intentional rather than awkward.
Next, make a stamped sentiment card using a positioning tool. Stamp the image first, then the words from right to left. You’ll see how much cleaner the spacing becomes when you’re not reaching over wet ink.
Finally, fussy-cut a few leaves or flowers and arrange them from the bottom right corner upwards. Left-handers often build compositions in a slightly different visual order, and that can be a lovely, personal signature rather than a flaw.
Being left-handed isn’t a problem to fix. It’s a different rhythm — one that can produce beautifully clean cards once your desk stops arguing with you. Move the mat, turn the board, put the scissors where your hand already wants them, and let the craft meet you halfway.